Assigning tickets ensures proper ownership and accountability for customer issues. Here’s how to assign your customer support tickets to a team member.
In Ticketdesk AI, you can assign tickets in two ways - manually or by setting up automatic assignment rules to auto-assign based on pre defined conditions.
Manual ticket assignment
Manual assignment gives you full control to support managers to set who handles each incoming ticket. Follow these steps to assign a ticket manually -
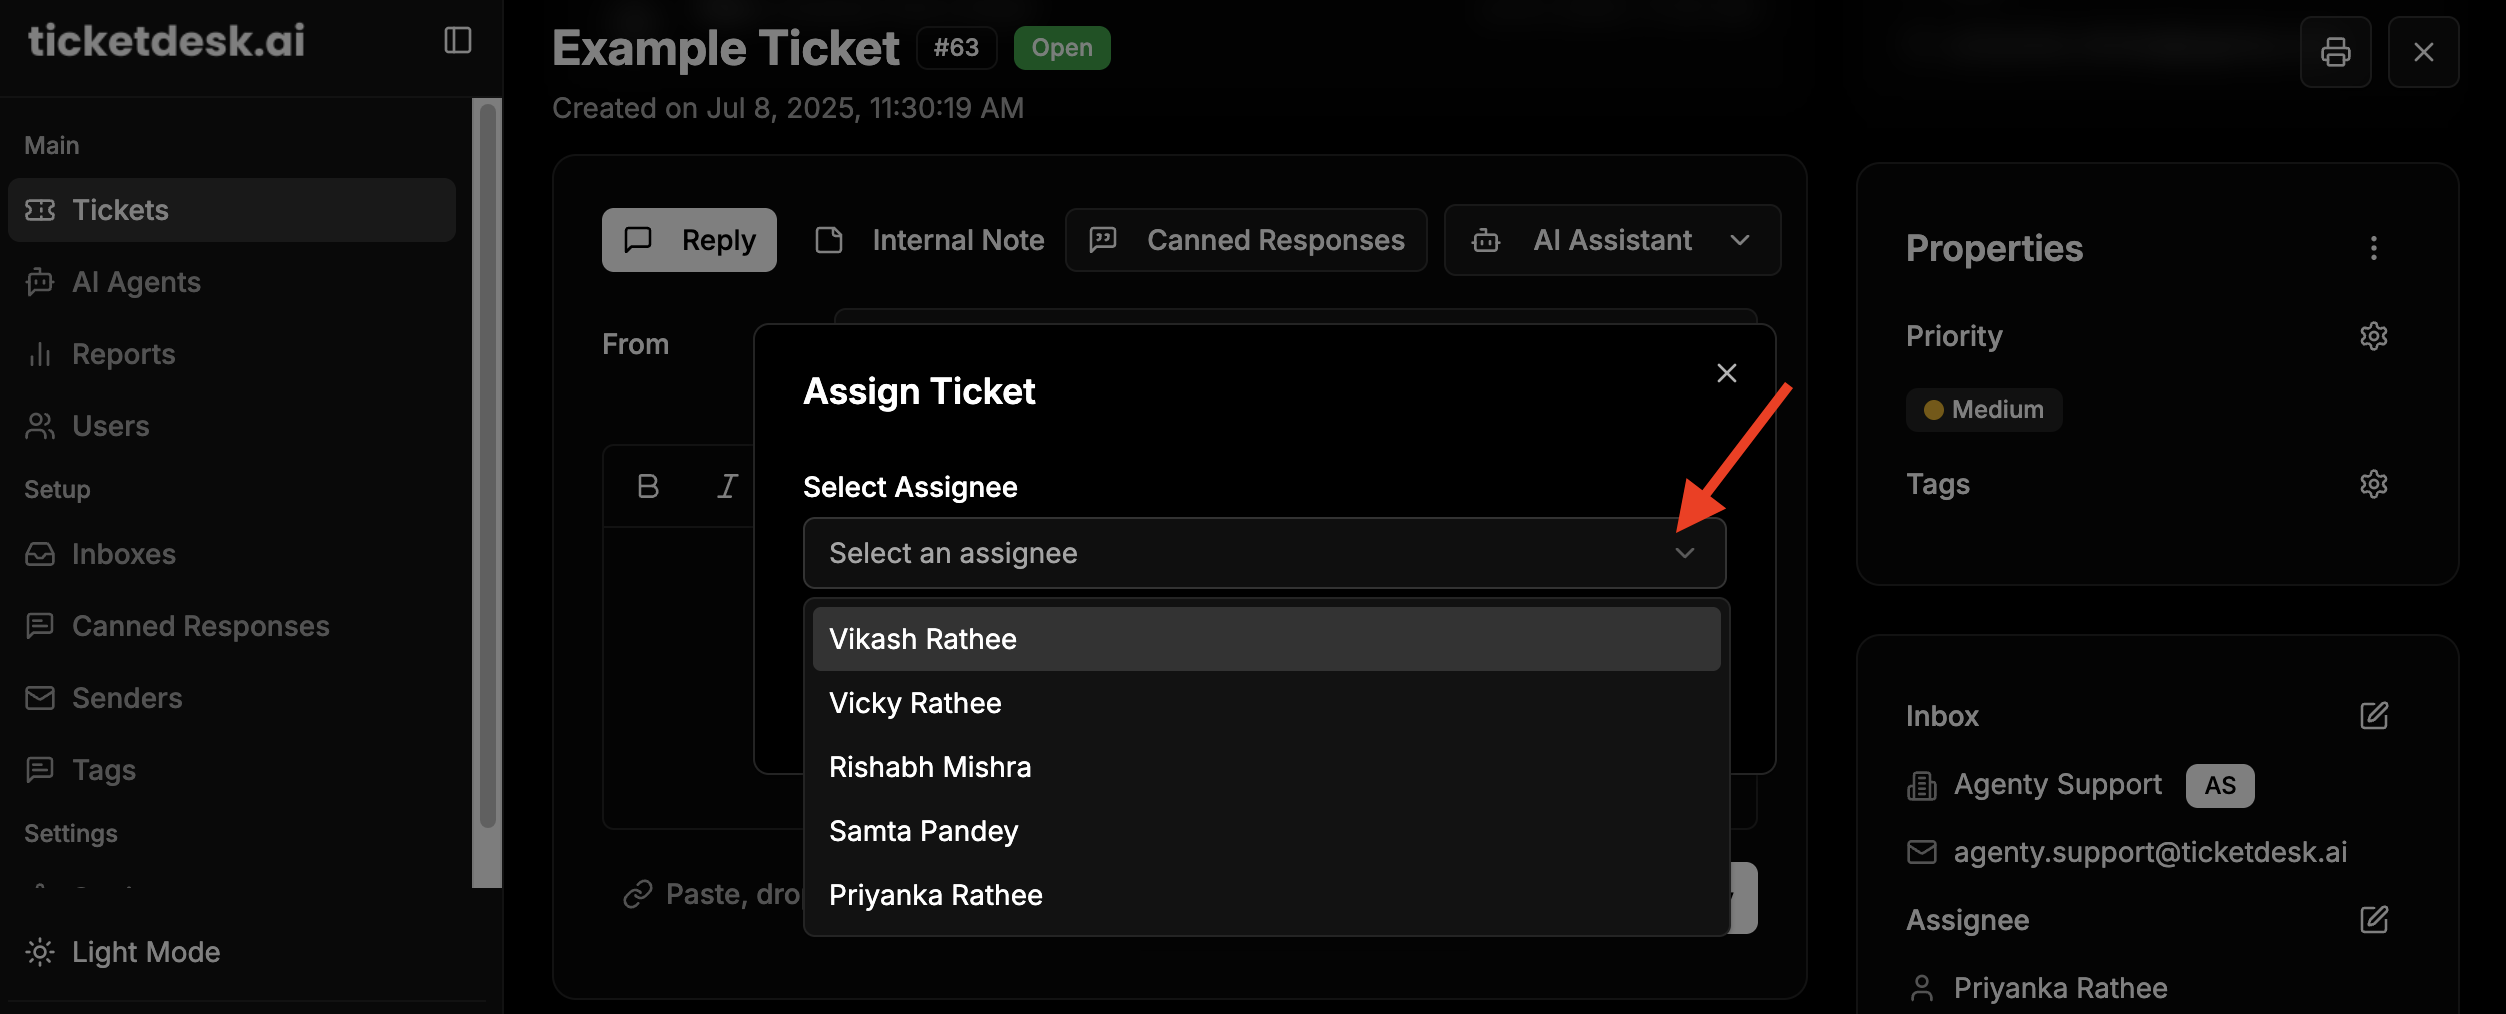
- Open the ticket you want to assign
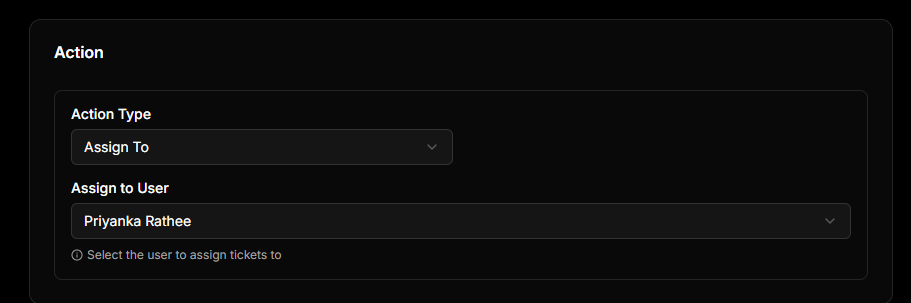
- Find the “Assignee” field in the right section of ticket details

- Click the dropdown arrow next to “Unassigned”
- Select an agent from the list
- Click “Save” to assign
Automatic assignment rules
Automatic rules help streamline your workflow by routing tickets to the right agent or department without manual effort.
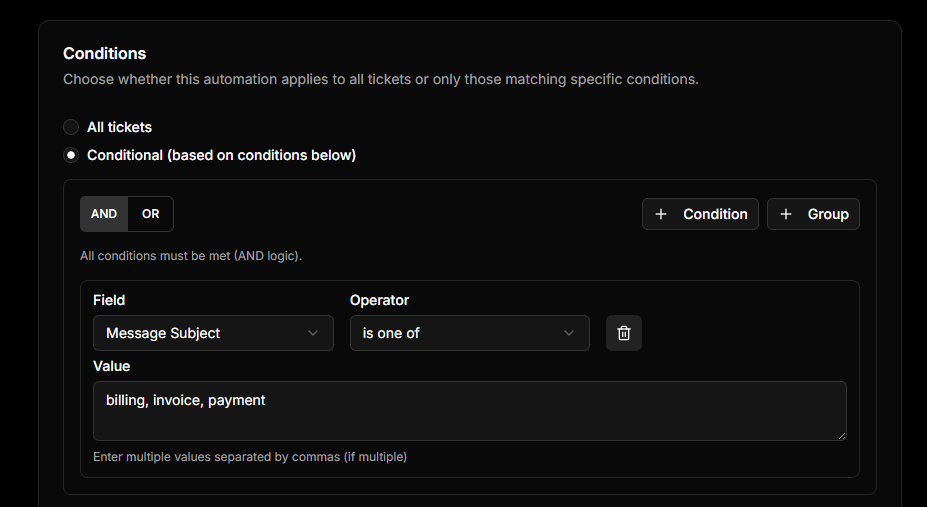
- Go to Automations > Create a new rule
- Set trigger conditions, for example: “if subject contains billing”
- Choose the target team or agent.
- Save the rule, and Ticketdesk AI will automatically assign future tickets that match the criteria.