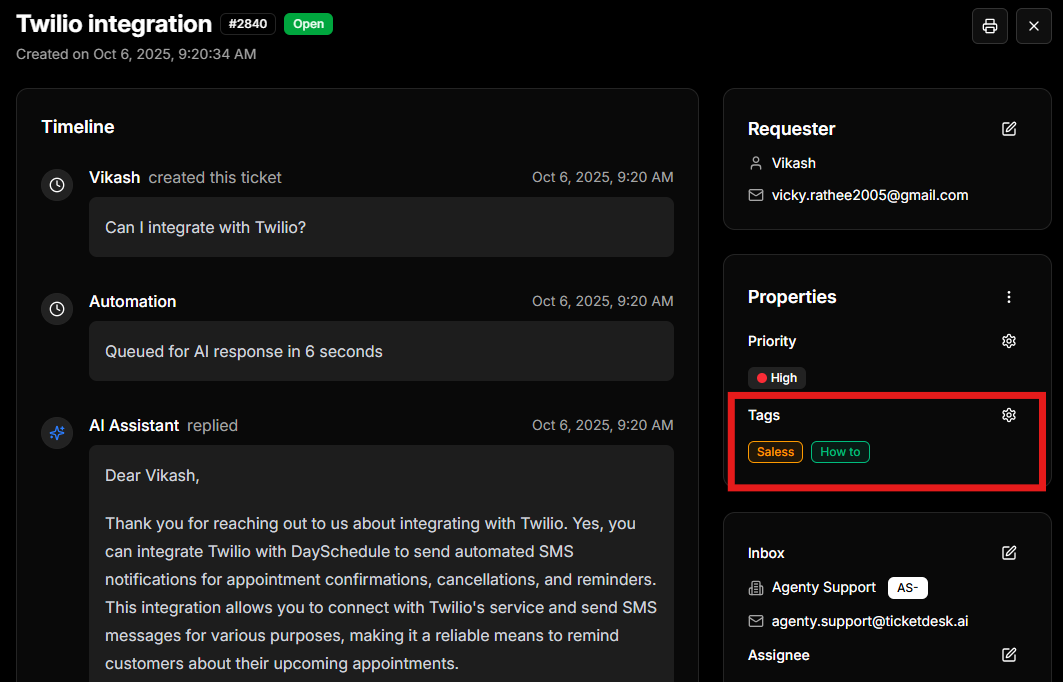
Tags are one of the simplest way to instantly categorizes support tickets by topic, urgency, or sentiment using AI.
Using Ticketdesk AI tag management, you can add and manage tags, and create AI workflows that automatically apply the right tags to incoming support tickets.
Add tags to tickets
Adding tags to a ticket helps your support team instantly understand the type, category, or status of a customer support request.
Follow these steps to add tags in a ticket -
- Open the ticket page
- Click on the setting button beside Tags in the sidebar
- Select the tags and click on Submit button to apply changes
Create new tags
If you don’t find the tag you need, you can create more tags to better manage your customer support tickets and add, change the tags needed.
Follow these steps to create new tags -
- Go to Settings > Tags from the main menu
- Click on the Create tag button
- Enter the new tag name and select a color
- Save it and the new tag will be added in your tags list to apply in any of the ticket.

Tags automation and AI
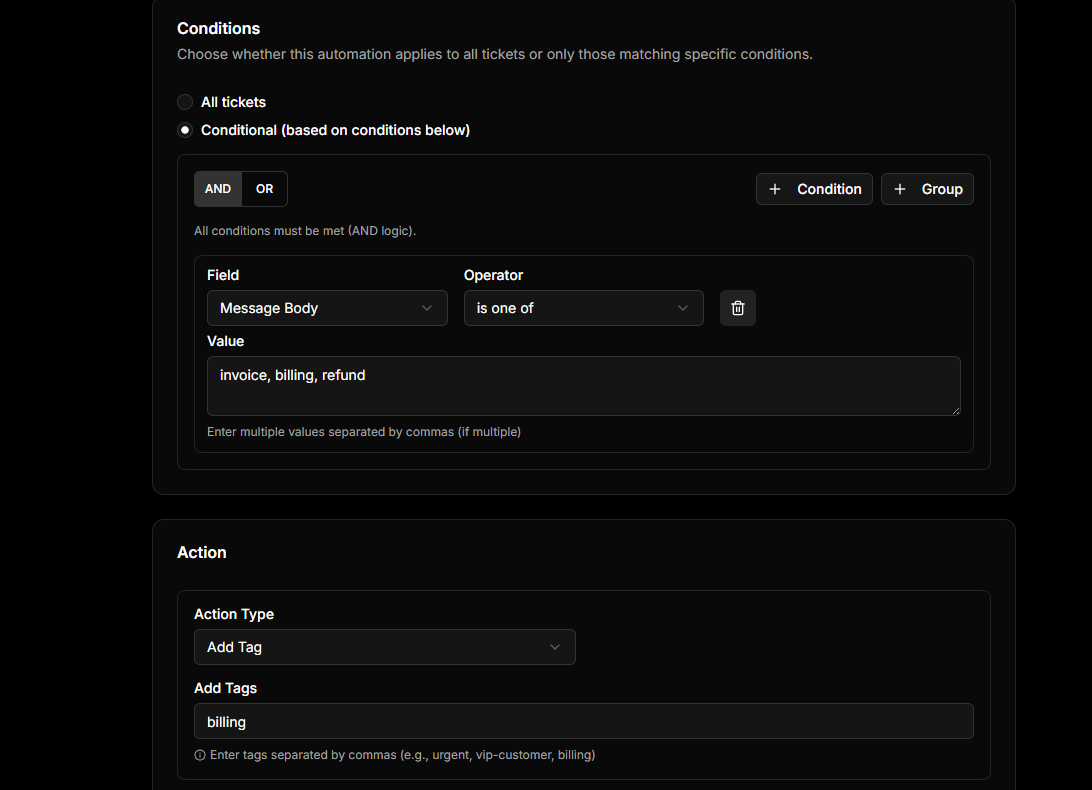
With Ticketdesk AI, you can also automate your entire tagging workflow so tickets are categorized automatically based on conditions or by AI.
Follow these steps to create a tags automation or AI workflow -
- Go to Automations from the main menu
- Create custom rules that automatically apply tags based on conditions you define
- Example: Apply the billing tag when a ticket mentions refund, payment, or invoice
- Or create an AI workflow to enable Ticketdesk AI to read and understand incoming emails to assign tags from the given list while creating a ticket.