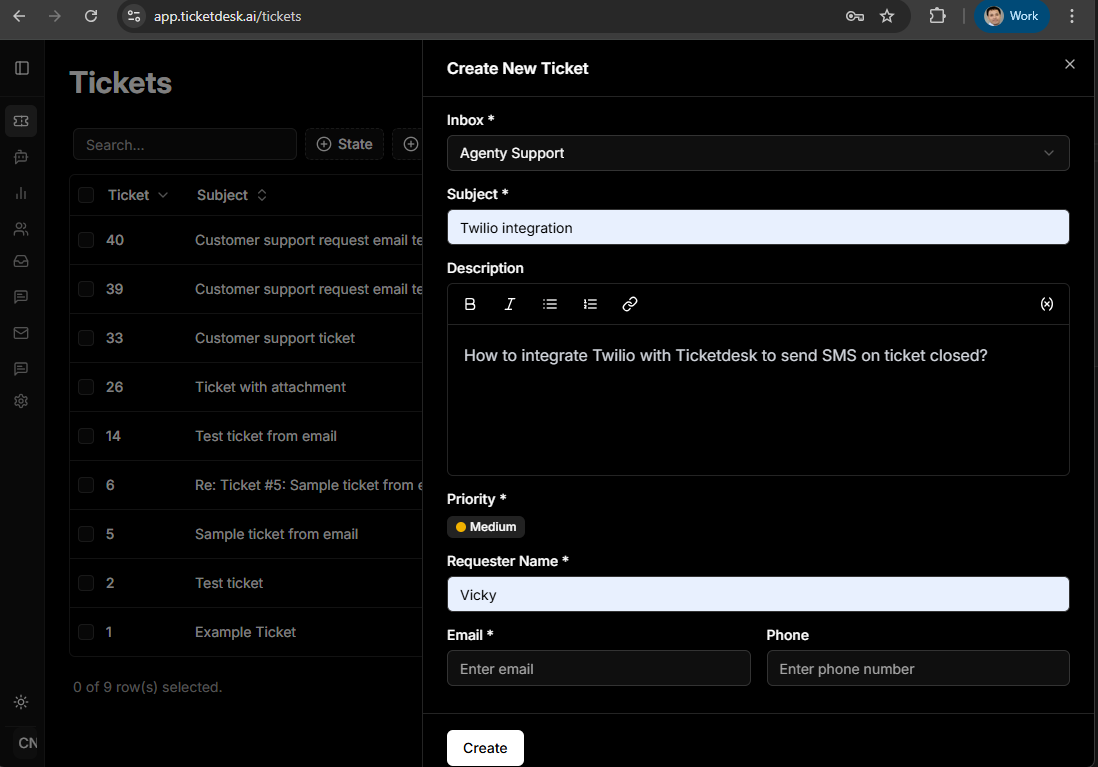
Creating support tickets helps you track and manage customer inquiries efficiently. Here’s how to create a new support ticket manually for customer support inquires or complaints.
Steps -
- Open the ticket creation form
- Fill in customer and ticket details
- Set priority and assignment
- Submit the ticket and assign to an agent
Creating Support Tickets
To create a new support ticket, enter the customer name, email, and phone number(if any). Add a subject line, detailed description of the issue, and select the inbox from the dropdown to ensure the ticket is assigned to right support group.

- Log into your Ticketdesk.AI account
- Click on “New Ticket” button in the top navigation
- Select “Create Ticket” from the dropdown menu
Your ticket is now created and will appear in the tickets table. The assigned agent will receive a notification and can begin working on the issue.
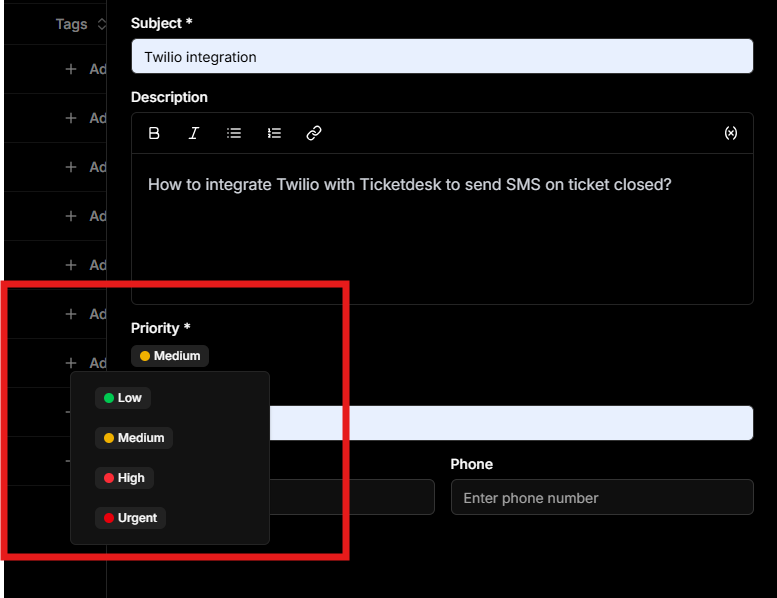
Ticket Priorities
When creating a ticket, choose the right priority level based on urgency and business impact, then assign it to the right agent or team. You can also enable the AI automations to handle the ticket by AI agents.
| Priority | Description |
|---|---|
| Low | Minor issue with no immediate impact |
| Medium | Moderate issue affecting workflow but not critical |
| High | Urgent issue impacting operations |
| Critical | Major disruption requiring immediate attention |
Ticket Sources
Ticketdesk AI automatically detects the source of each ticket and sets it automatically, or you use the API to set the source of your choice.
The source is identified from one of the following channels and can be used to set different automation rules(or AI agent) to handle respective channel support tickets:
| Source | Description |
|---|---|
| Chat | Tickets submitted via live chat on your website or app. |
| API | Tickets created through API integrations with other systems. |
| Tickets received from customer emails. | |
| Web | Tickets submitted through a web form on your site. |
| App | Tickets created via our mobile apps. |
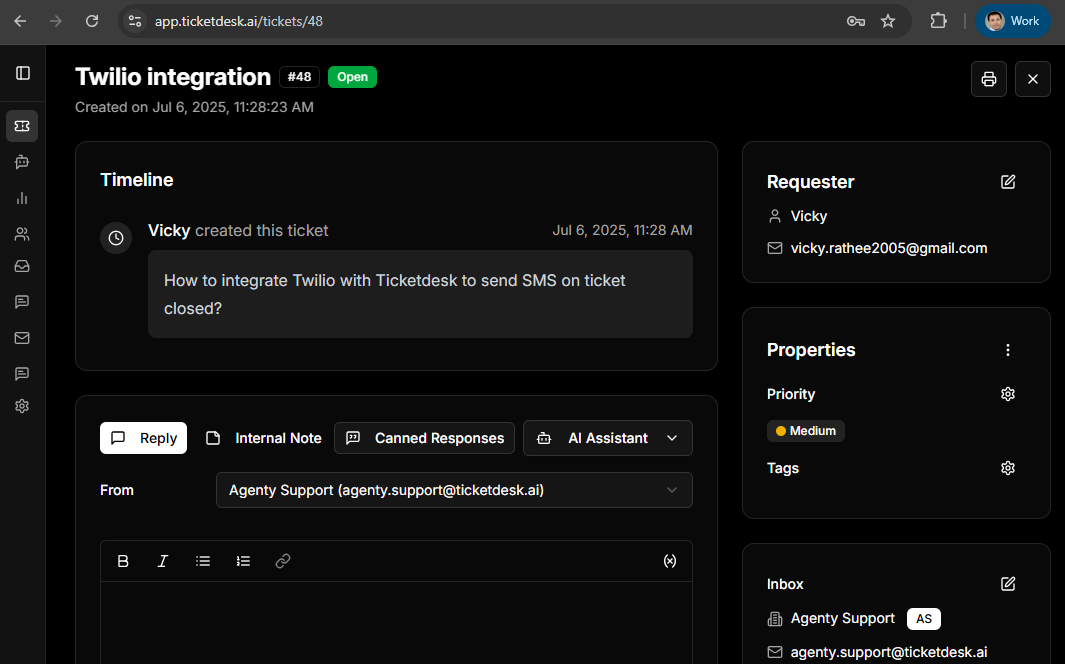
Ticket Details View
Once a ticket is created, you will be redirected to the ticket details view - which allows you to manage and track the issue.
You can see all the information provided by the customer(or created manual) for this ticket, add internal notes, reply to ticket, upload attachments etc.
The view also lets you run automated workflows, assign or reassign the ticket, set priority, and add tags for better organization.