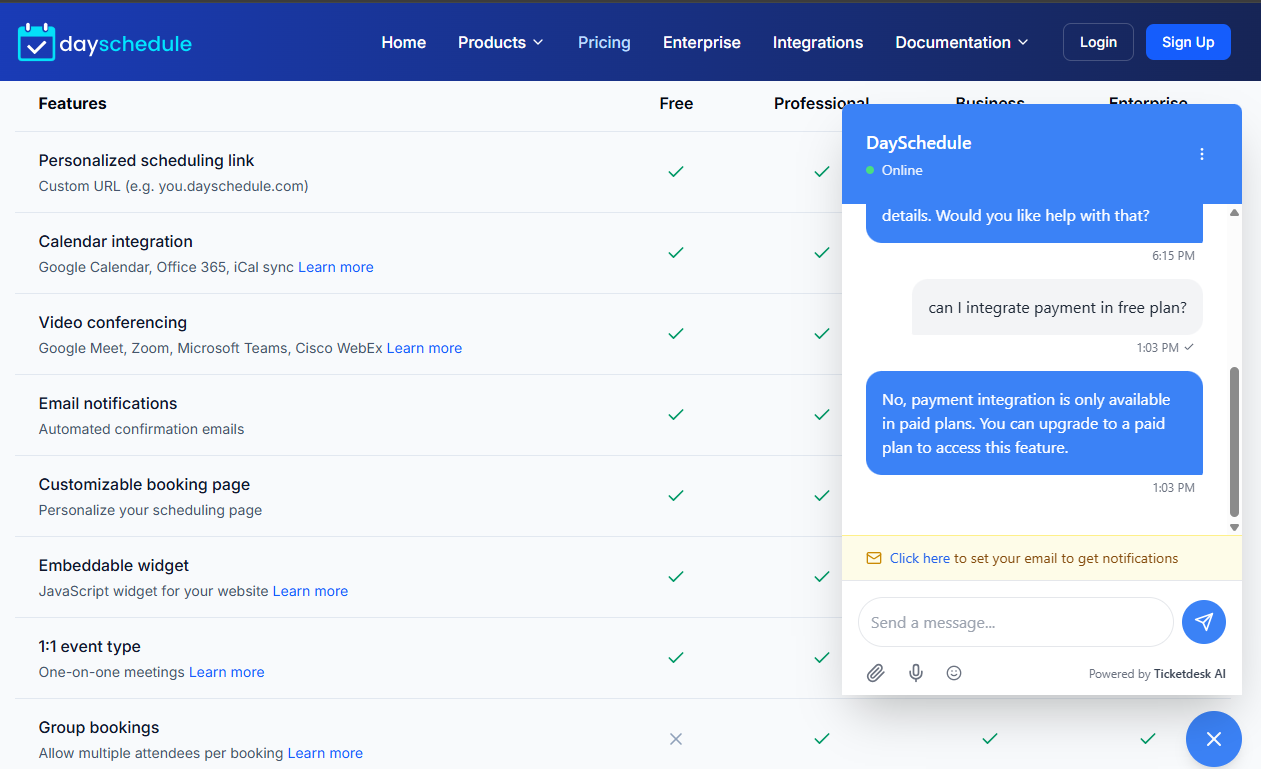
In this article will guide you through the simple steps to embed the Ticketdesk AI chatbot into your React or Next.js application. By embedding this widget, you can provide instant, AI-powered support directly on your website, improving customer experience and streamlining support operations.
The Ticketdesk AI system allows you to train your AI agent on your custom documentation, website content, or markdown files to ensure it answers questions specifically relevant to your business.
Furthermore, you have the flexibility to connect advanced, custom AI models like ChatGPT 5.2, Gemini Flash, or Claude Opus 4.6 for state-of-the-art AI responses on email or chat.
Prerequisites
Before you begin, ensure you have the following:
- A working React or Next.js project.
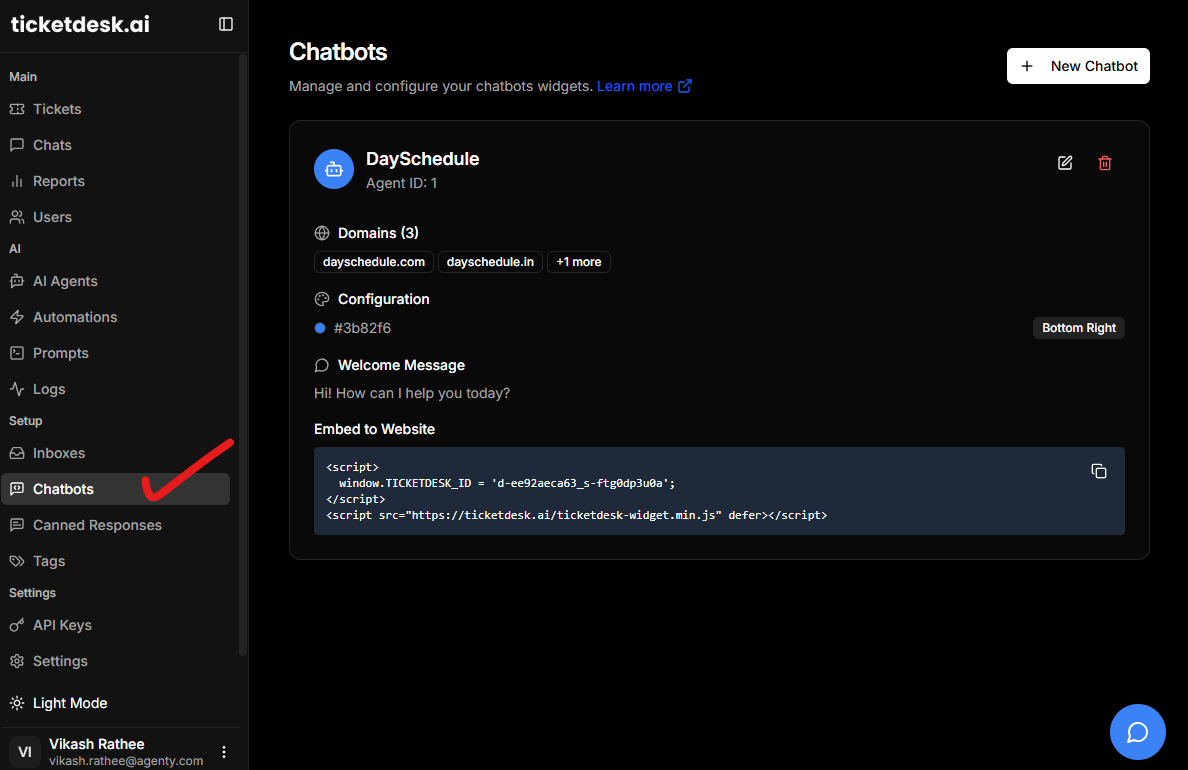
- Your unique Ticketdesk AI chatbot ID, which you can find in your Ticketdesk AI account > Chatbots page.
Embedding the Ticketdesk AI Chatbot
The Ticketdesk AI widget is delivered via a standard JavaScript snippet that can be placed in your application. For React and Next.js applications, the best practice is to load this script once, typically in your main layout or root component.
Step 1: Obtain Your Chatbot ID
First, log in to your Ticketdesk AI account and locate your specific widget ID. This ID is essential for initializing the chatbot correctly. Let’s assume your ID is xxx for the examples below.
Step 2: Create a Reusable Component (Recommended for React/Next.js)
To ensure the script loads only once and manages its lifecycle properly, creating a dedicated component is recommended.
Chatbot Component
You can create a file named TicketdeskAIChatbot.js (or .jsx / .tsx):
import React, { useEffect } from 'react';

const TicketdeskAIChatbot = () => {
  useEffect(() => {
    // Check if the script has already been loaded to prevent duplication
    if (window.TICKETDESK_ID) {
      return;
    }

    // 1. Set the Ticketdesk ID globally for the widget script
    window.TICKETDESK_ID = 'xxx'; // Replace 'xxx' with your actual Ticketdesk ID

    // 2. Create and append the script element
    const script = document.createElement('script');
    script.src = 'https://ticketdesk.ai/ticketdesk-widget.min.js';
    script.defer = true;
    script.id = 'ticketdesk-ai-script'; // Optional: Add an ID for easier management

    document.body.appendChild(script);

    // Cleanup function: Optional but good practice for component unmount
    return () => {
      const existingScript = document.getElementById('ticketdesk-ai-script');
      if (existingScript) {
        document.body.removeChild(existingScript);
      }
      delete window.TICKETDESK_ID;
    };
  }, []); // Empty dependency array ensures this runs only once on mount

  return null; // This component renders nothing directly
};

export default TicketdeskAIChatbot;
Step 3: Integrate the Component
Now, import and use the TicketdeskAIChatbot component in your main application layout file.
For a standard React Application (e.g., in App.js or index.js):
import React from 'react';
import TicketdeskAIChatbot from './TicketdeskAIChatbot'; // Adjust path as needed

function App() {
  return (
    <div>
      {/* Your main application content */}
      <h1>Welcome to My App</h1>

      {/* Embed the Ticketdesk AI Chatbot */}
      <TicketdeskAIChatbot />
    </div>
  );
}

export default App;
For a Next.js Application (e.g., in pages/_app.js or your root Layout component in App Router):
In Next.js, placing it in the root layout file (pages/_app.js for Pages Router or your main Layout for App Router) ensures it loads across all pages.
// pages/_app.js (Pages Router Example)
import TicketdeskAIChatbot from '../components/TicketdeskAIChatbot';

function MyApp({ Component, pageProps }) {
  return (
    <>
      <Component {...pageProps} />
      {/* Embed the Ticketdesk AI Chatbot */}
      <TicketdeskAIChatbot />
    </>
  );
}

export default MyApp;
Alternative: Direct Snippet Placement (Less Recommended for SPAs)
If you prefer the quickest method and are less concerned with strict component lifecycle management (or if using a static site setup), you can place the code directly in your main HTML entry point, which for Next.js is usually pages/_document.js (before the closing </body> tag) or in a standard React app, right before the closing </body> tag in public/index.html.
Here is the snippet for reference:
<!-- Place this inside the <body> tag of your main HTML file -->
<script>
  window.TICKETDESK_ID = 'xxx';
</script>
<script src="https://ticketdesk.ai/ticketdesk-widget.min.js" defer></script>
By following these steps, the Ticketdesk AI chatbot will be successfully integrated into your React or Next.js application, ready to assist your users.