Embedding an AI chatbot into your Vue or Nuxt application is straightforward with the Ticketdesk AI widget. Using LLM models like ChatGPT, Gemini etc. you can automate support tickets, provide instant responses to your customers.
Whether you are building a custom Vue AI chat component or looking for a functional Vue chatbot example to follow, this guide serves as a practical Vue js chatbot template.
I will walk you through the steps to embed your customer support AI agent onto your Vue website, enhancing user engagement and providing instant answers.
The process primarily involves adding a small JavaScript snippet to your application, ensuring the TicketdeskAI widget loads correctly across your pages for live customer support with AI.
Prerequisites
Before you begin, ensure you have the following:
- A working Vue or Nuxt project.
- Your unique
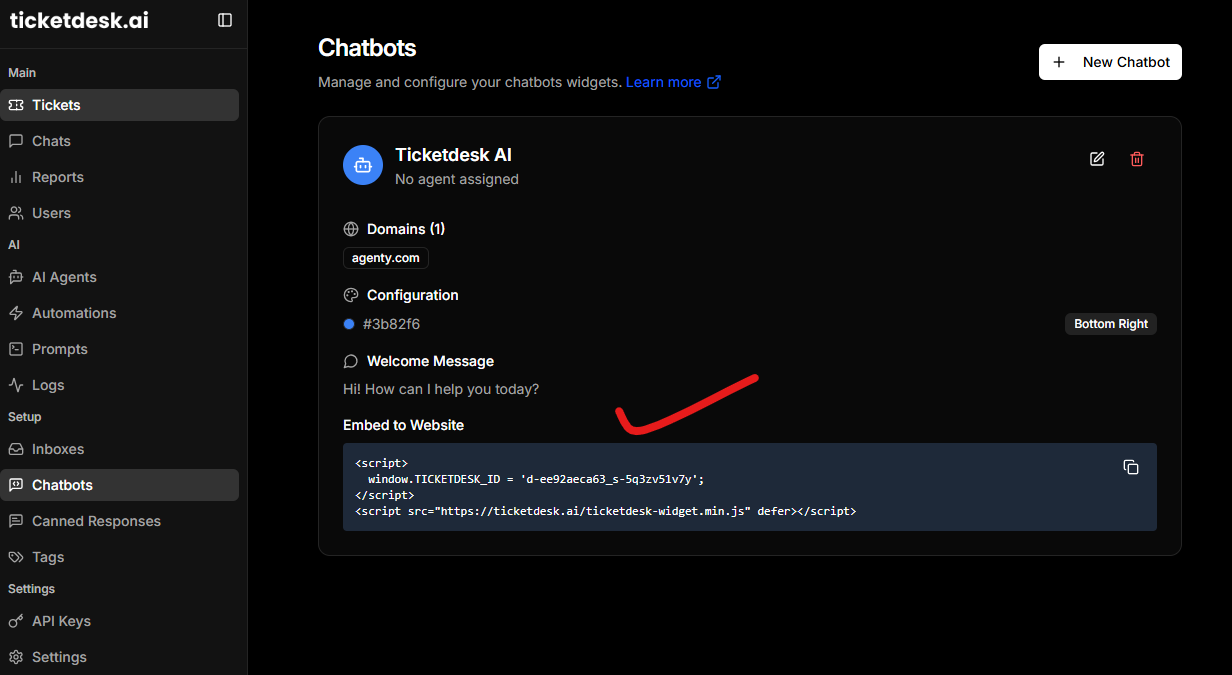
TICKETDESK_IDprovided by Ticketdesk AI.
Embed Ticketdesk AI Widget in Vue
The Ticketdesk AI widget uses a simple JavaScript snippet that dynamically loads the necessary components into your application. You can train your AI agent for custom docs, your website, markdown files etc. to answer questions relevant to your business on chat, or connect custom advanced models like ChatGPT 5.2, Gemini flash, Claude Opus 4.6 etc. for more complex interactions.
Method 1: Adding the Widget to a Standard Vue Application
For a standard Vue CLI or Vite-based Vue project, the best practice is to place the initialization script in your main application entry point, typically index.html.
-
Edit public/index.html: Open the
index.htmlfile located in yourpublicdirectory. -
Insert the Script Tag: Place the following code just before the closing
</body>tag. Remember to replace'xxx'with your actualTICKETDESK_ID.
<!DOCTYPE html>
<html lang="en">
  <head>
    <meta charset="utf-8">
    <meta http-equiv="X-UA-Compatible" content="IE=edge">
    <meta name="viewport" content="width=device-width,initial-scale=1.0">
    <title>my-vue-app</title>
  </head>
  <body>
    <div id="app"></div>
    <!-- Ticketdesk AI Widget Script Start -->
    <script>
      window.TICKETDESK_ID = 'YOUR_TICKETDESK_ID_HERE'; // Replace 'YOUR_TICKETDESK_ID_HERE'
    </script>
    <script src="https://ticketdesk.ai/ticketdesk-widget.min.js" defer></script>
    <!-- Ticketdesk AI Widget Script End -->
  </body>
</html>
This ensures the Ticketdesk AI widget loads globally on every page that uses this entry point.
Method 2: Adding the Widget to a Nuxt Application (Nuxt 2 & Nuxt 3)
For Nuxt applications, the recommended approach is to use the dedicated loading mechanism to ensure scripts are loaded correctly, especially when dealing with Server-Side Rendering (SSR).
For Nuxt 3
In Nuxt 3, you should use the app.vue file or the nuxt.config.ts file to inject the script globally. Using nuxt.config.ts is generally cleaner for global scripts.
-
Configure
nuxt.config.ts: Open or create yournuxt.config.tsfile. -
Add to
app.head: Use theapp.head.scriptproperty to inject the script.
// nuxt.config.ts
export default defineNuxtConfig({
  app: {
    head: {
      script: [
        {
          // Injecting the ID first
          innerHTML: "window.TICKETDESK_ID = 'YOUR_TICKETDESK_ID_HERE';", // Replace this
          tagPosition: 'bodyClose'
        },
        {
          // Injecting the main widget script
          src: 'https://ticketdesk.ai/ticketdesk-widget.min.js',
          defer: true,
          tagPosition: 'bodyClose'
        }
      ]
    }
  }
})
For Nuxt 2
In Nuxt 2, you use the head property within nuxt.config.js (or nuxt.config.ts).
-
Configure
nuxt.config.js: Open your configuration file. -
Add to
head: Use thescriptarray within theheadobject.
// nuxt.config.js
export default {
  head: {
    title: 'my-nuxt-app',
    meta: [
      // ... existing meta tags
    ],
    script: [
      {
        // Injecting the ID first
        innerHTML: "window.TICKETDESK_ID = 'YOUR_TICKETDESK_ID_HERE';", // Replace this
        type: 'text/javascript',
        body: true
      },
      {
        // Injecting the main widget script
        src: 'https://ticketdesk.ai/ticketdesk-widget.min.js',
        defer: true,
        body: true
      }
    ]
  },

  // ... other configuration
}
Creating a Vue Chat Component
If you prefer to wrap the widget logic inside a specific part of your application, you can create a dedicated ticketdesk-widget component. This allows you to control the loading state or visibility based on user interaction or specific page requirements.
// ticketdesk-widget.vue
export default {
  name: 'TicketdeskWidget',
  mounted() {
    window.TICKETDESK_ID = 'xxx';
    const script = document.createElement('script');
    script.src = 'https://ticketdesk.ai/ticketdesk-widget.min.js';
    script.defer = true;
    document.body.appendChild(script);
  }
}
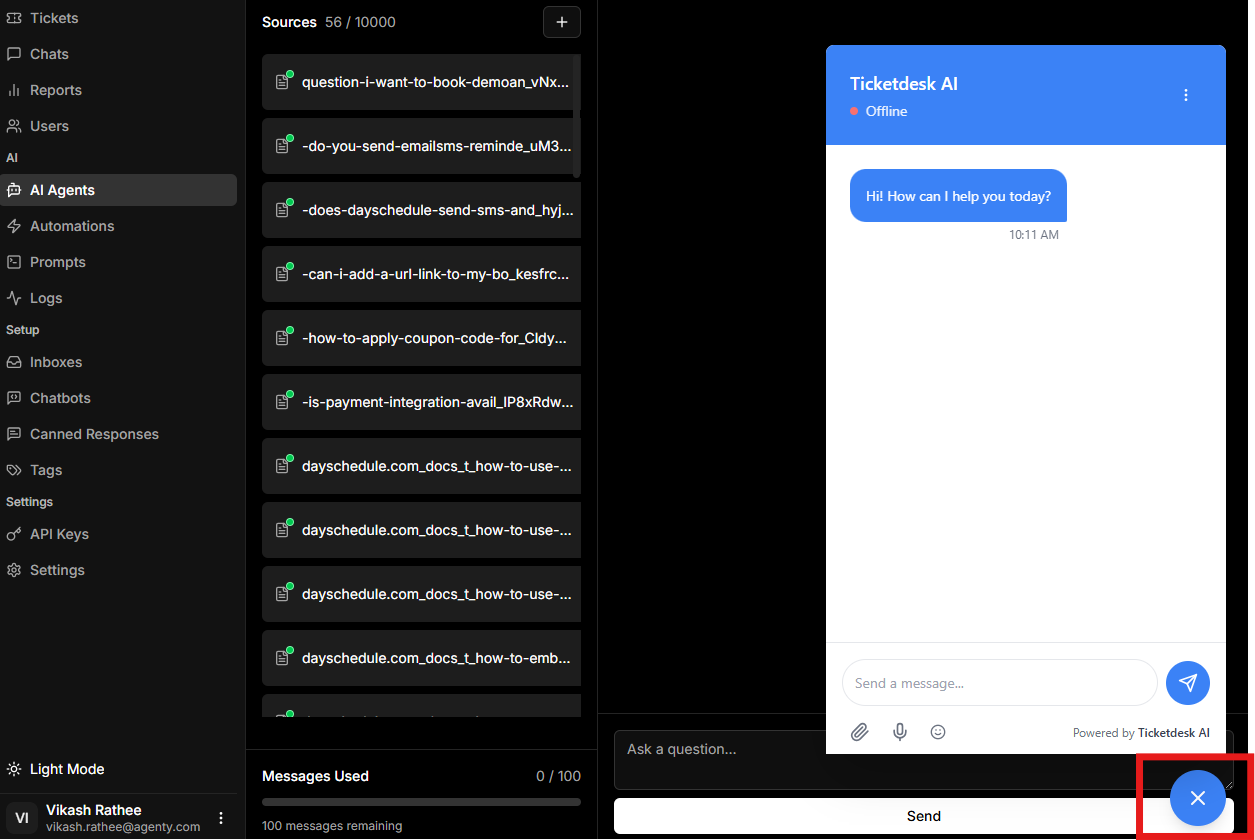
Verifying the Installation
After implementing the code in your Vue or Nuxt project and running your development server (npm run dev or yarn dev), you should see the Ticketdesk AI chat icon appear on your page.
If you don’t see it immediately, try a hard refresh or check your browser’s developer console for any errors related to script loading.
This method ensures the chatbot widget is available across your entire site for customer support, lead generation and many other use cases.