In this article I will show you how to add the Ticketdesk AI chatbot to your WordPress website. Integrating an AI chatbot can significantly enhance customer service, provide instant support, and automate various tasks.
The Ticketdesk AI chatbot simulates human conversations through both text and voice interactions, helping businesses automate customer support and improve customer experience. Powered by advanced Large Language Models (LLMs) such as Claude, GPT-5, Gemini, and Z.ai, Ticketdesk AI can understand customer queries, process information, and deliver accurate, context-aware responses on your WordPress website.
Adding an AI chatbot to your WordPress site is a straightforward process using Code Snippet plugin. Here’s a step-by-step guide using Ticketdesk AI.
Create Your Ticketdesk AI Chatbot
First, you need to set up and configure your AI chatbot with Ticketdesk AI.
- Go to the Ticketdesk AI account > Chatbots
- Follow the instructions to create and train your AI agent. You can upload custom documents, connect it to your website’s content to crawl all pages, or use markdown files to ensure it answers questions relevant only to your business.
Chatbot Embed Code
Once your chatbot is configured, you will see a unique embed code.
-
Navigate to your chatbot’s settings
-
Copy the JavaScript embed code. It will look something like this:
<script>
  window.TICKETDESK_ID = 'xxx';
</script>
<script src="https://ticketdesk.ai/ticketdesk-widget.min.js" defer></script>
Replace
xxxwith your actual Ticketdesk AI ID.
Embed Chatbot to Your WordPress Website
There are several ways to add custom JavaScript code to your WordPress site. We’ll cover the most common methods.
Method 1: Using a WordPress Plugin (Recommended)
This is the easiest method for users who are not comfortable editing theme files directly.
-
Install a Code Snippet Plugin:
- Log in to your WordPress admin dashboard.
- Go to Plugins > Add New.
- Search for a plugin like “Insert Headers and Footers,” “Code Snippets,” or “WPCode – Insert Headers, Footers, and Custom Code Snippets.”
- Install and activate your chosen plugin.
-
Add the Code:
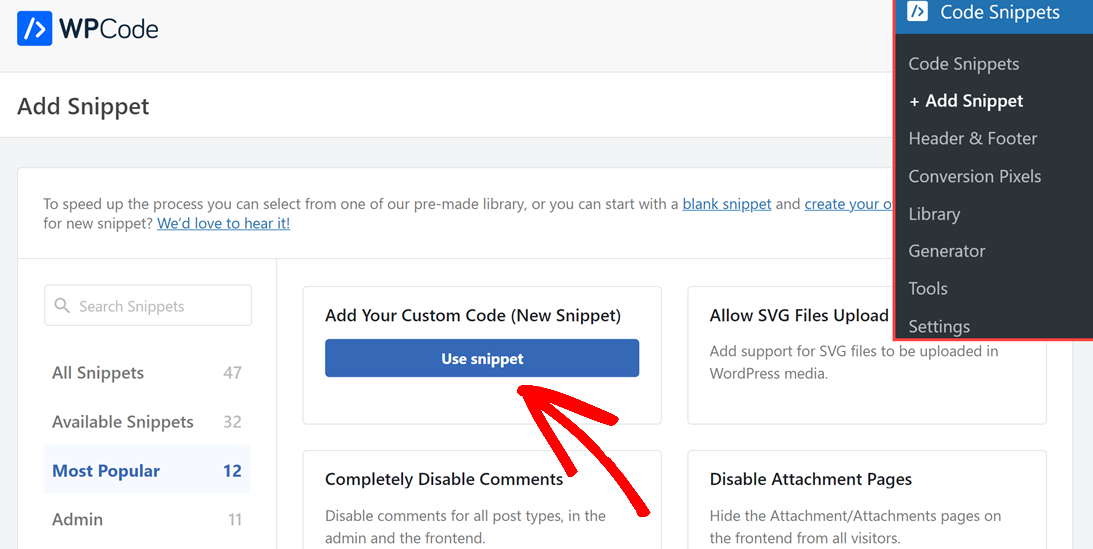
- Once activated, navigate to the plugin’s settings (e.g., Settings > Insert Headers and Footers or Code Snippets > Add New).
- Paste the Ticketdesk AI embed code into the section designated for “Scripts in Footer” or “Custom JavaScript.”
- Save your changes.
Method 2: Manually Adding Code to Your Theme’s functions.php File
This method is for users who are comfortable with code and want to avoid extra plugins.
-
Access Your Theme Files:
- Log in to your WordPress admin dashboard.
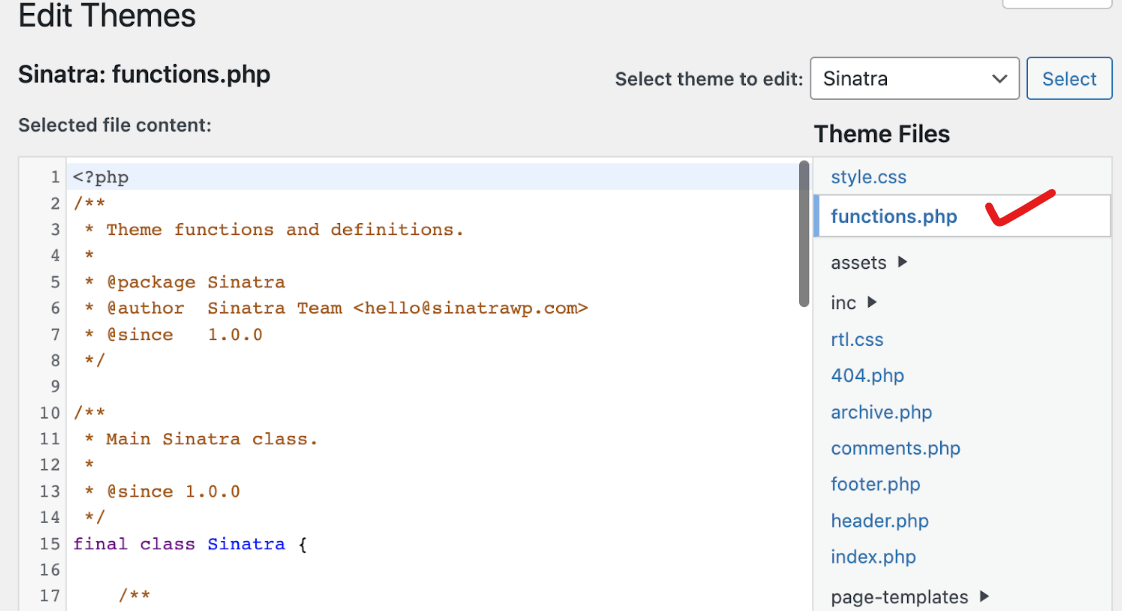
- Go to Appearance > Theme Editor.
- Select your active theme from the dropdown menu (it’s highly recommended to use a child theme to avoid losing your changes when the parent theme updates).
- Find the
functions.phpfile in the list of theme files on the right.
-
Add the Code:
- Add the following code snippet to the end of your
functions.phpfile. Remember to replacexxxwith your actual Ticketdesk AI ID.
<?php function add_ticketdesk_ai_chatbot_script() { ?> <script> window.TICKETDESK_ID = 'xxx'; // Replace 'xxx' with your actual Ticketdesk AI ID </script> <script src="https://ticketdesk.ai/ticketdesk-widget.min.js" defer></script> <?php } add_action('wp_footer', 'add_ticketdesk_ai_chatbot_script'); ?>- Update File.
- Add the following code snippet to the end of your
Method 3: Manually Adding Code to Your Theme’s footer.php File
This method directly places the script before the closing </body> tag.
-
Access Your Theme Files:
- Log in to your WordPress admin dashboard.
- Go to Appearance > Theme Editor.
- Select your active theme (again, a child theme is recommended).
- Find the
footer.phpfile.
-
Add the Code:
- Paste the Ticketdesk AI embed code just before the closing
</body>tag.
<!-- Your existing footer content --> <script> window.TICKETDESK_ID = 'xxx'; </script> <script src="https://ticketdesk.ai/ticketdesk-widget.min.js" defer></script> </body> </html>- Update File.
- Paste the Ticketdesk AI embed code just before the closing
Verify the Chatbot Installation
After adding the code, it’s essential to verify that your AI chatbot is working correctly.
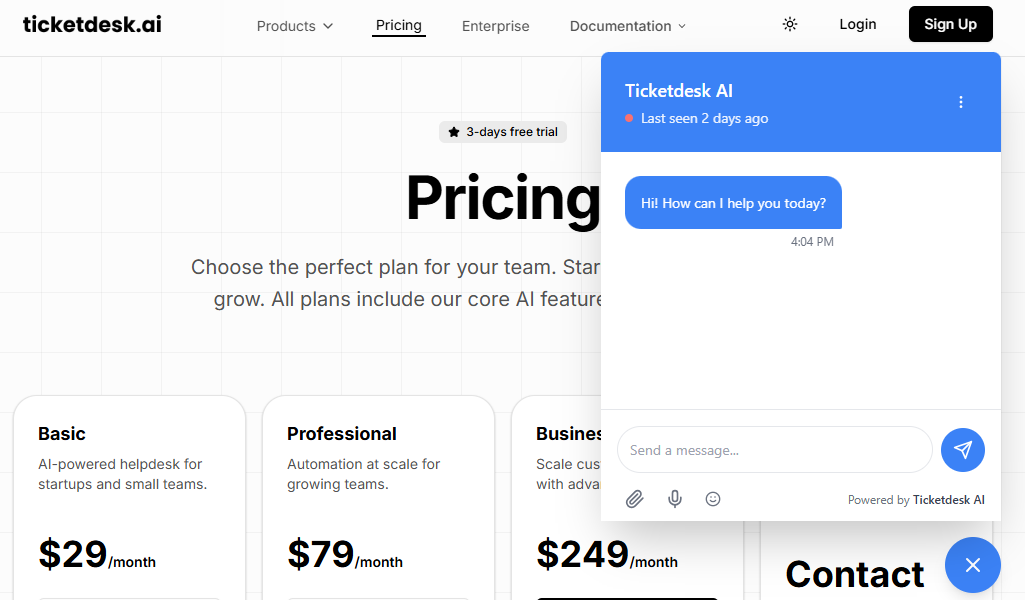
- Open your WordPress website in a web browser.
- Look for the Ticketdesk AI chatbot widget on the bottom right corner of your screen.
- Click on the widget to open the chat interface and test its functionality by asking a few questions.
Customizing Your AI Chatbot
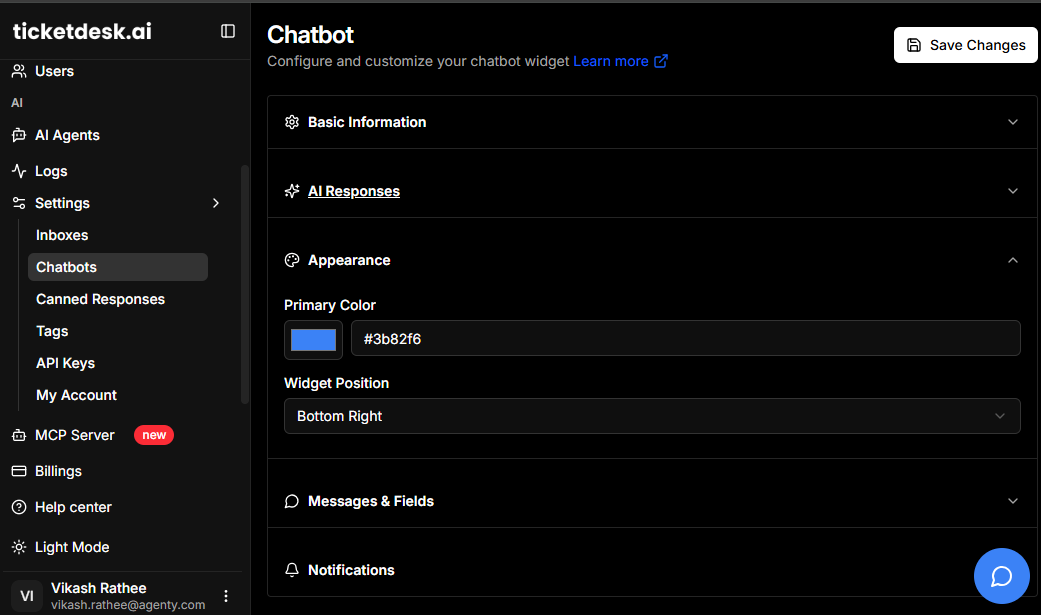
Ticketdesk AI provides options to customize the appearance and behavior of your chatbot to match your website’s branding. You can find these options within your Ticketdesk AI dashboard. Customize colors, welcome messages, and even the chatbot’s icon.
Integrating an AI chatbot like Ticketdesk AI into your WordPress website is a powerful way to enhance user experience, automate support, and provide instant information.
By following these steps, you can easily add this valuable tool to your site and start reaping its benefits.