Ticketdesk AI enables your support desk to provide 24x7 responses with AI, to reduce repetitive tasks for human agents, and improve overall ticket resolution times. In this guide, I’ll walk through how to create and AI automation to enable automatic AI replies to you customer support tickets.
Prerequisites
Automations are the rules that decide when and how your AI agent acts on a ticket. With automations, your agent can reply to customers automatically, follow up after silence, set ticket priority, apply tags, assign tickets, and even close them after inactivity.
In this guide, I will walk you through each automation and how to set it up.
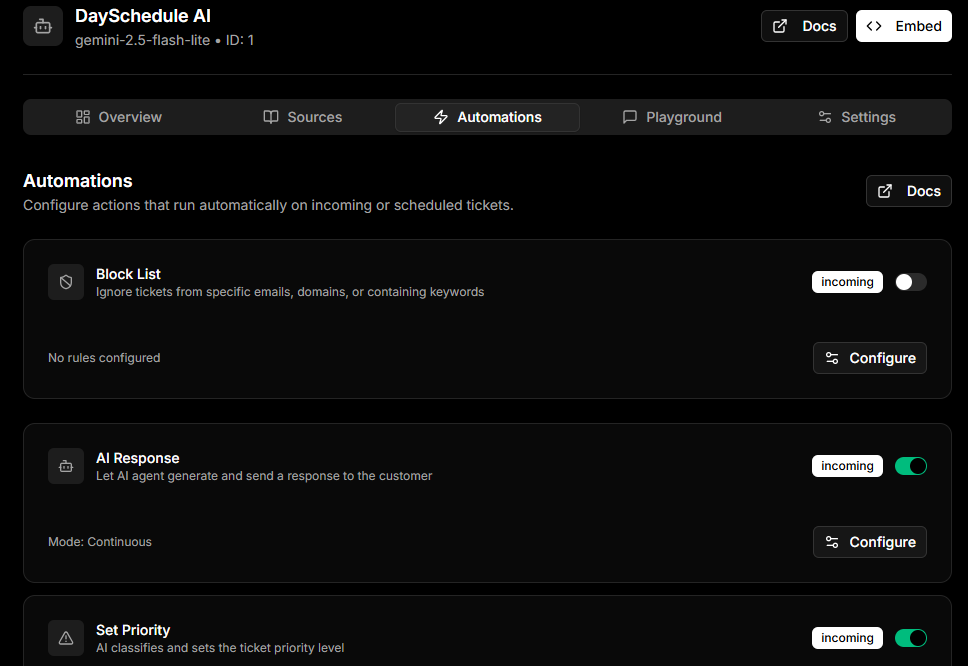
Open the Automations Tab
- Go to Agents and open your agent.
- Click the Automations tab.
You will see a list of available automations. Each one has a toggle to turn it on or off and a Configure button to open its settings.
AI Response
This automation lets the agent generate and send a reply to the customer when a new ticket comes in. You can choose between two reply modes:
- First message only, the agent replies only to the very first message in a ticket
- Always, the agent replies to every customer message in the ticket
Inside the configuration sheet you can also customize the prompt that controls how the reply is written on email or chatbot. Save your changes when done.
Custom Prompt
You can configure a custom prompt to instruct the AI to include specific elements in every response. For example:
- Include an email signature with your company name etc.
- Maintain a specific tone or style, e.g., professional, or concise.
By setting a custom prompt on automation, the instructions will be included in the main AI agent prompt for email responses.
Sample Prompt
Write a professional and helpful email response to respond to this customer support ticket.

At the end of your email, append the signature provided inside an XML <signature> element below. (do not include the XML tags themselves).

<signature>
If my answer was not good enough, simply reply "I prefer human support".

Best Regards,
Ticketdesk.AI
</signature>
Reply mode
There are 2 types of reply mode available on Ticketdesk AI:
- First Reply Only
- Continuous AI Replies
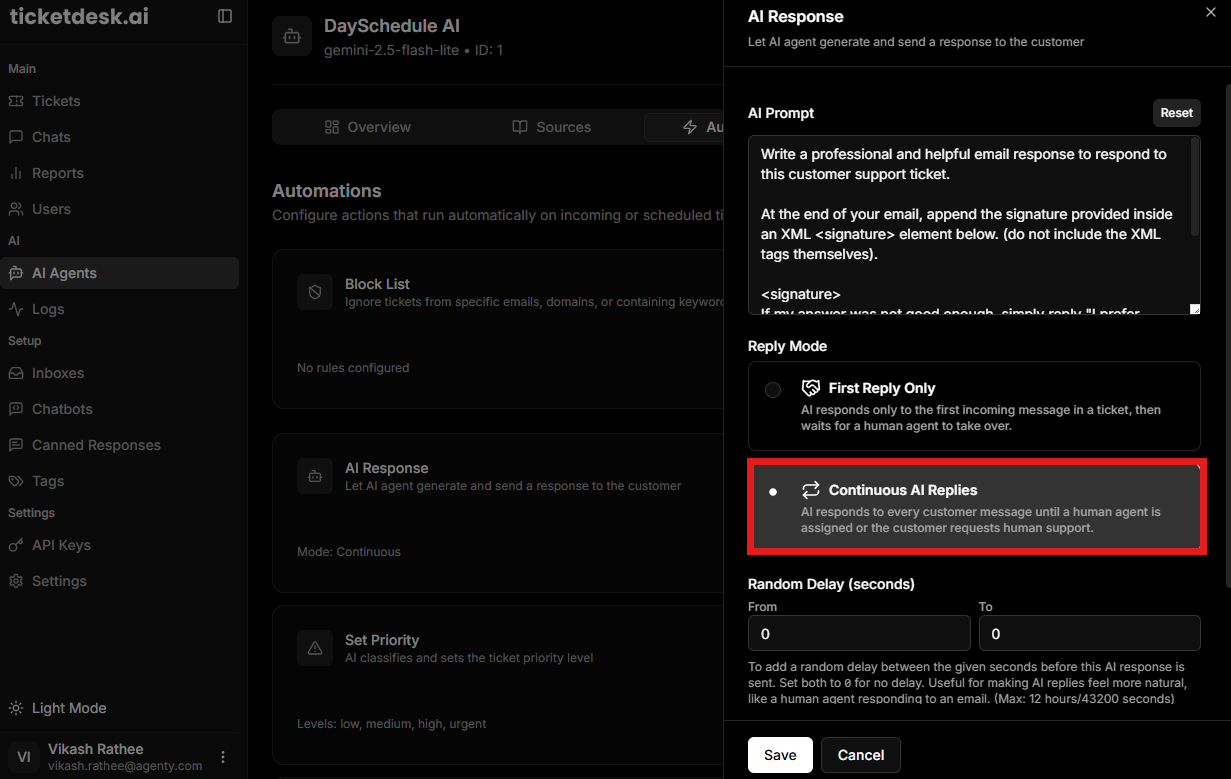
First Reply Only
The AI sends a response only to the first incoming customer message in a ticket. After that, the conversation is handed over to a human agent.
Best for:
- Lead qualification
- Greeting new customers
- Collecting initial details before human follow-up
Continuous AI Replies
The AI continues responding to customer messages throughout the conversation until:
- a human agent is assigned, or
- the customer asks to speak with a human.
Human Support Integration
AI will handle the tickets automatically until one of the following occurs:
- The ticket is manually assigned to a human agent.
- The customer explicitly requests human assistance by typing phrases like “Please assign to human support” or similar intent expressions given below.
| Customer Message | Requires Human Support |
|---|---|
| Please assign to human support | Yes |
| I need a human agent | Yes |
| Can I talk to a real person? | Yes |
| Escalate this to human help | Yes |
| human support please | Yes |
When either of these conditions is met, the AI stops responding, and the ticket is routed to a human agent for resolution. This ensures complex issues are handled by people while routine queries are resolved automatically.
AI Follow Up
If a customer goes quiet, the AI Follow Up automation can send a polite check-in email after a defined inactivity period. You can set:
- The follow up prompt that defines the tone and content
- The inactivity timeout in hours
For example, set 24 hours to send a follow up one day after the last message.
Close Ticket
This automation automatically closes a ticket after a set number of hours of inactivity. It is useful for keeping your inbox clean and only requires one setting, the inactivity timeout in hours.
Set Priority
The Set Priority automation uses AI to classify each incoming ticket and assign it a priority level. You choose which priority levels are allowed:
- Low
- Medium
- High
- Urgent
You can also customize the prompt that tells the AI how to judge priority based on your business rules.
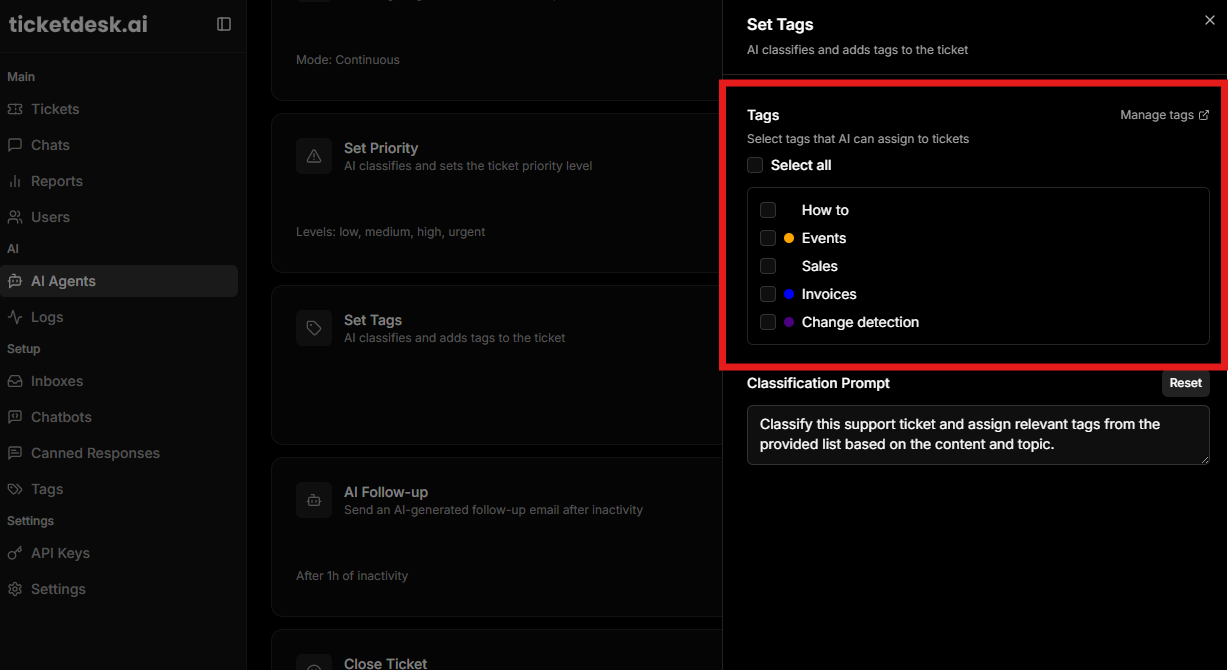
Set Tags
Set Tags works the same way as Set Priority but for tags. The AI reads the ticket and applies relevant tags from your tag library.
Tags are managed centrally in Ticketdesk AI. To add or rename tags, go to Settings > Tags. Inside the automation sheet you can select which tags the agent is allowed to use, including a Select All option to enable every tag at once.
Assign To
Assign tickets directly to a specific team member when they come in. Open the configuration sheet and pick the user from the list.
If you want tickets distributed across a team instead of one person, use Routing instead.
Block List
The Block List automation lets you ignore tickets from specific senders, domains, or with certain keywords. Each rule has its own action, either close the ticket or skip automation. See the dedicated block list guide for full details.
Save and Test
After enabling and configuring an automation, send a test ticket to your inbox to confirm the agent behaves the way you expect. You can also use the Playground to dry-run the AI replies without sending a real ticket.