Live chat
Manage live chat conversations
Updated · View as Markdown
Every conversation started in your website chat widget shows up on the Chats page, whether the AI answered it or not. You can read along while the AI replies, step in at any point and answer the visitor yourself.
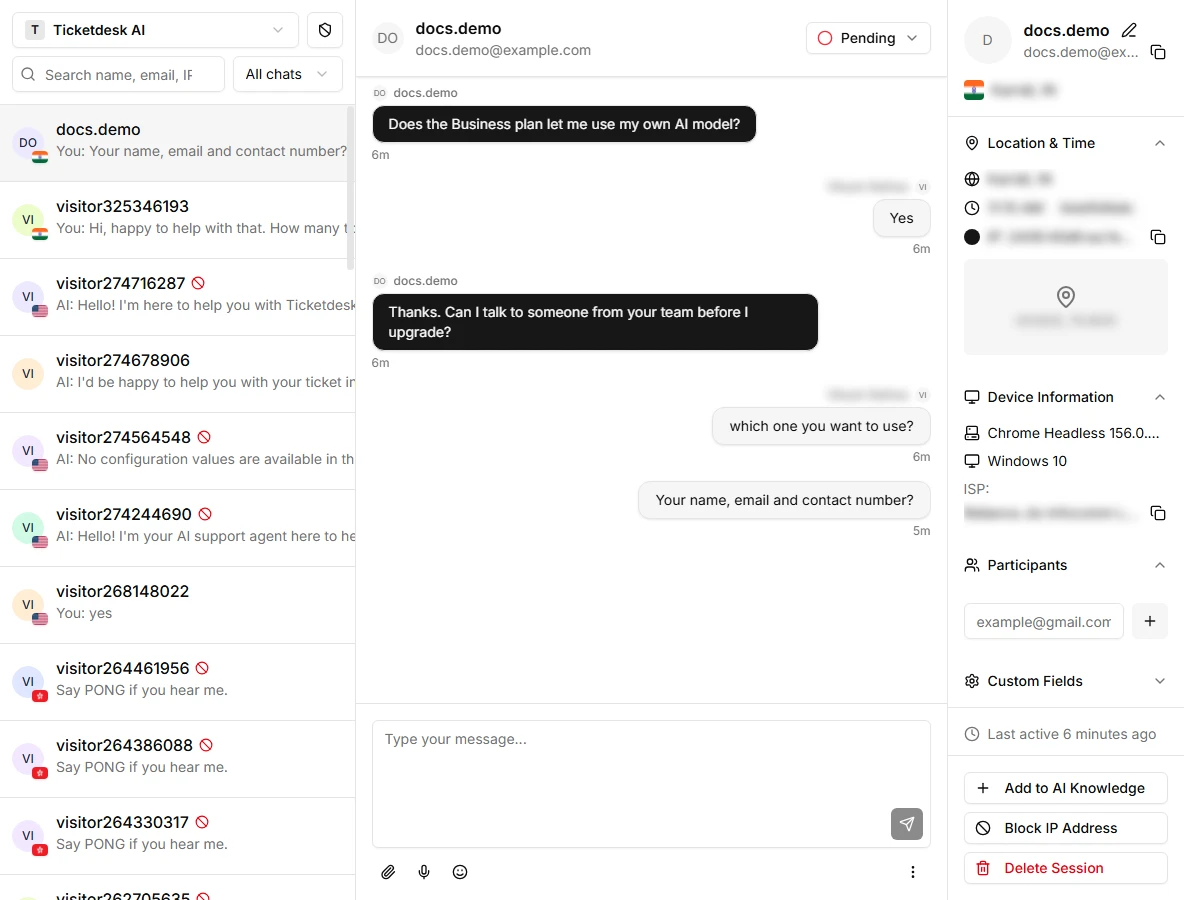
The page has three columns: the conversation list, the open conversation, and the visitor's details.
Pick a chatbot
If you have more than one chatbot, Chats first asks you to select a site. Switch between them later with the menu at the top of the conversation list. With a single chatbot, the page opens it directly.
No chatbot yet? Create one under Settings, Chatbots and embed it on your website.
Find a conversation
New conversations appear at the top of the list as they come in, with a flag for the visitor's country and a preview of the last message. Messages you sent start with "You:" and AI replies with "AI:".
Use the search box to find a visitor by name, email or IP address. The filter next to it narrows the list:
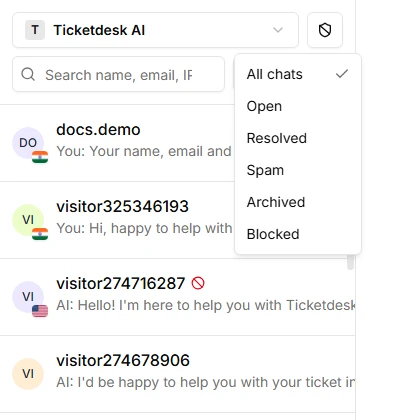
- All chats shows every conversation
- Open shows unresolved chats
- Resolved, Spam and Archived show chats you moved there
- Blocked shows visitors whose IP address you blocked
Reply to a visitor
Open a conversation, type in the message box and press Enter. Your reply appears in the visitor's widget immediately, with your name above it. Use the icons under the box to attach a file, record a voice message or add an emoji.
While you have the Chats page open, Ticketdesk AI counts you as an online operator. That matters if your chatbot's reply mode is Operator Offline: the AI stays quiet while an operator is online and takes over when nobody is. Hand off chats from AI to a human explains the reply modes.
Allow browser notifications when the app asks, so you hear about new messages while the tab is in the background.
Visitor details
The right panel shows what Ticketdesk AI knows about the visitor:
- Name and email, if the visitor entered them. Click the pencil icon to edit them, for example after the visitor shares their email in a message.
- Location & Time: city, local time, time zone and IP address
- Device Information: browser, operating system and ISP
- Participants: add email addresses that should receive the transcript too
- Custom Fields: extra key and value pairs you want to keep with the session
To collect the email before the chat starts, turn on required fields in the chatbot's Messages & Fields settings.
Resolve, archive or flag a chat
The status button in the conversation header shows the current state, such as Pending or Resolved. Click it to change the state or run an action:
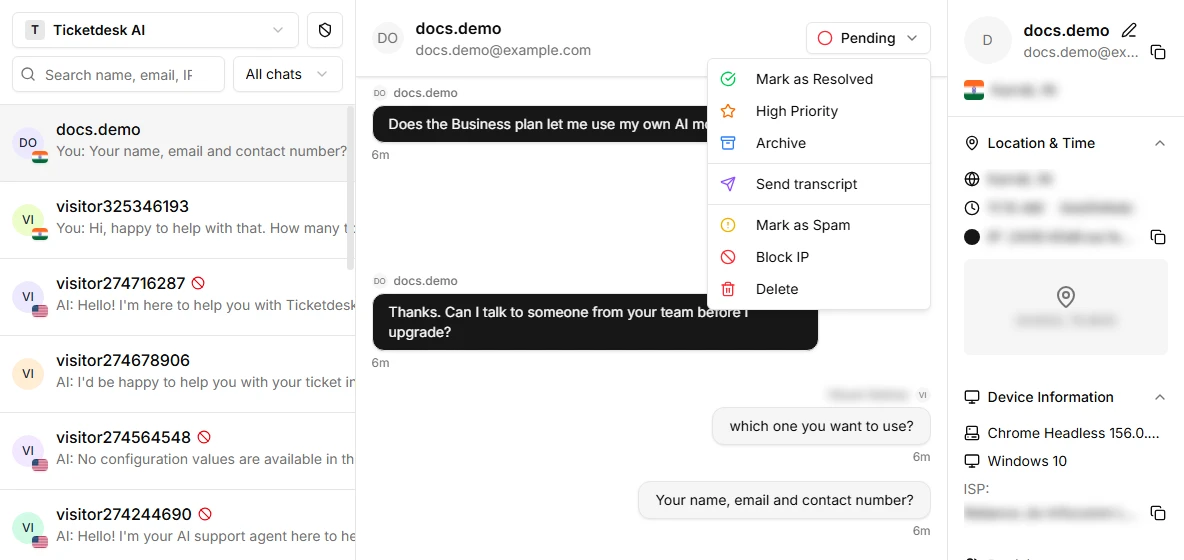
- Mark as Resolved or Mark as Unresolved
- High Priority flags the chat for your team
- Archive moves it out of the open list
- Send transcript emails the full conversation
- Mark as Spam and Block IP deal with abuse, see block spam visitors
- Delete removes the session
Send a transcript
Choose Send transcript from the status menu. Pick who should get it: Operator (you), User (including all participants), or both. The user option sends it to the visitor's email and every address listed under Participants.
Turn good answers into AI knowledge
When you answer a question the AI couldn't, click Add to AI Knowledge at the bottom of the visitor panel. It opens a new training source for the chatbot's AI agent with the visitor's questions and your replies already filled in. Edit the text so it reads as a clean question and answer, then save it. The agent uses it for the next visitor who asks the same thing.
The button needs an AI agent connected to the chatbot. More on sources in how to train an AI agent.